The Best Chocolate Chip Cookie Quest, Volume 1

The Best Chocolate Chip Cookie Quest, Volume 1
Variations on chocolate chip cookies are endless – almost as endless as people’s chocolate chip cookie preferences. Soft and chewy, or buttery and crispy? Bittersweet or milk chocolate chips? Crisco or butter? What’s the best ratio of white sugar to brown sugar? How many chips per cookie? How big should each cookie be? What wild ingredient can I sneak in (like these tahini cookies that I’ve seen all over recently)?
I used to be a crispy/bittersweet/butter/heavy on the brown sugar/3-5 chips per cookie type of gal. Something about the crunch really gets me. I love a good soft cookie on occasion too (and I feel like that is a bit more of a crowd pleaser) – so that’s what I find myself making more often. I never considered that there might be a recipe out there that could make chewy and crispy possible in the same cookie.
Last week, when I realized we had 4 lbs. of butter in the fridge, I decided it was the right time to try out the chocolate chip cookie recipe in my favorite baking book. I’m (often) guilty of not reading an entire recipe before I start to make it, especially when I know I have all of the ingredients in the house or it’s a recipe that’s somewhat familiar. This was the case when I made these cookies – I paid little attention to the baking instructions until it was time to pop them in the oven. When I went back to the recipe to check the bake time, I read the following instructions…’Lift the side of the baking sheet up about four inches and gently let it drop down against the oven rack, so the edges of the cookies set and the inside falls back down (this will feel wrong, but trust me).’
Um…what?
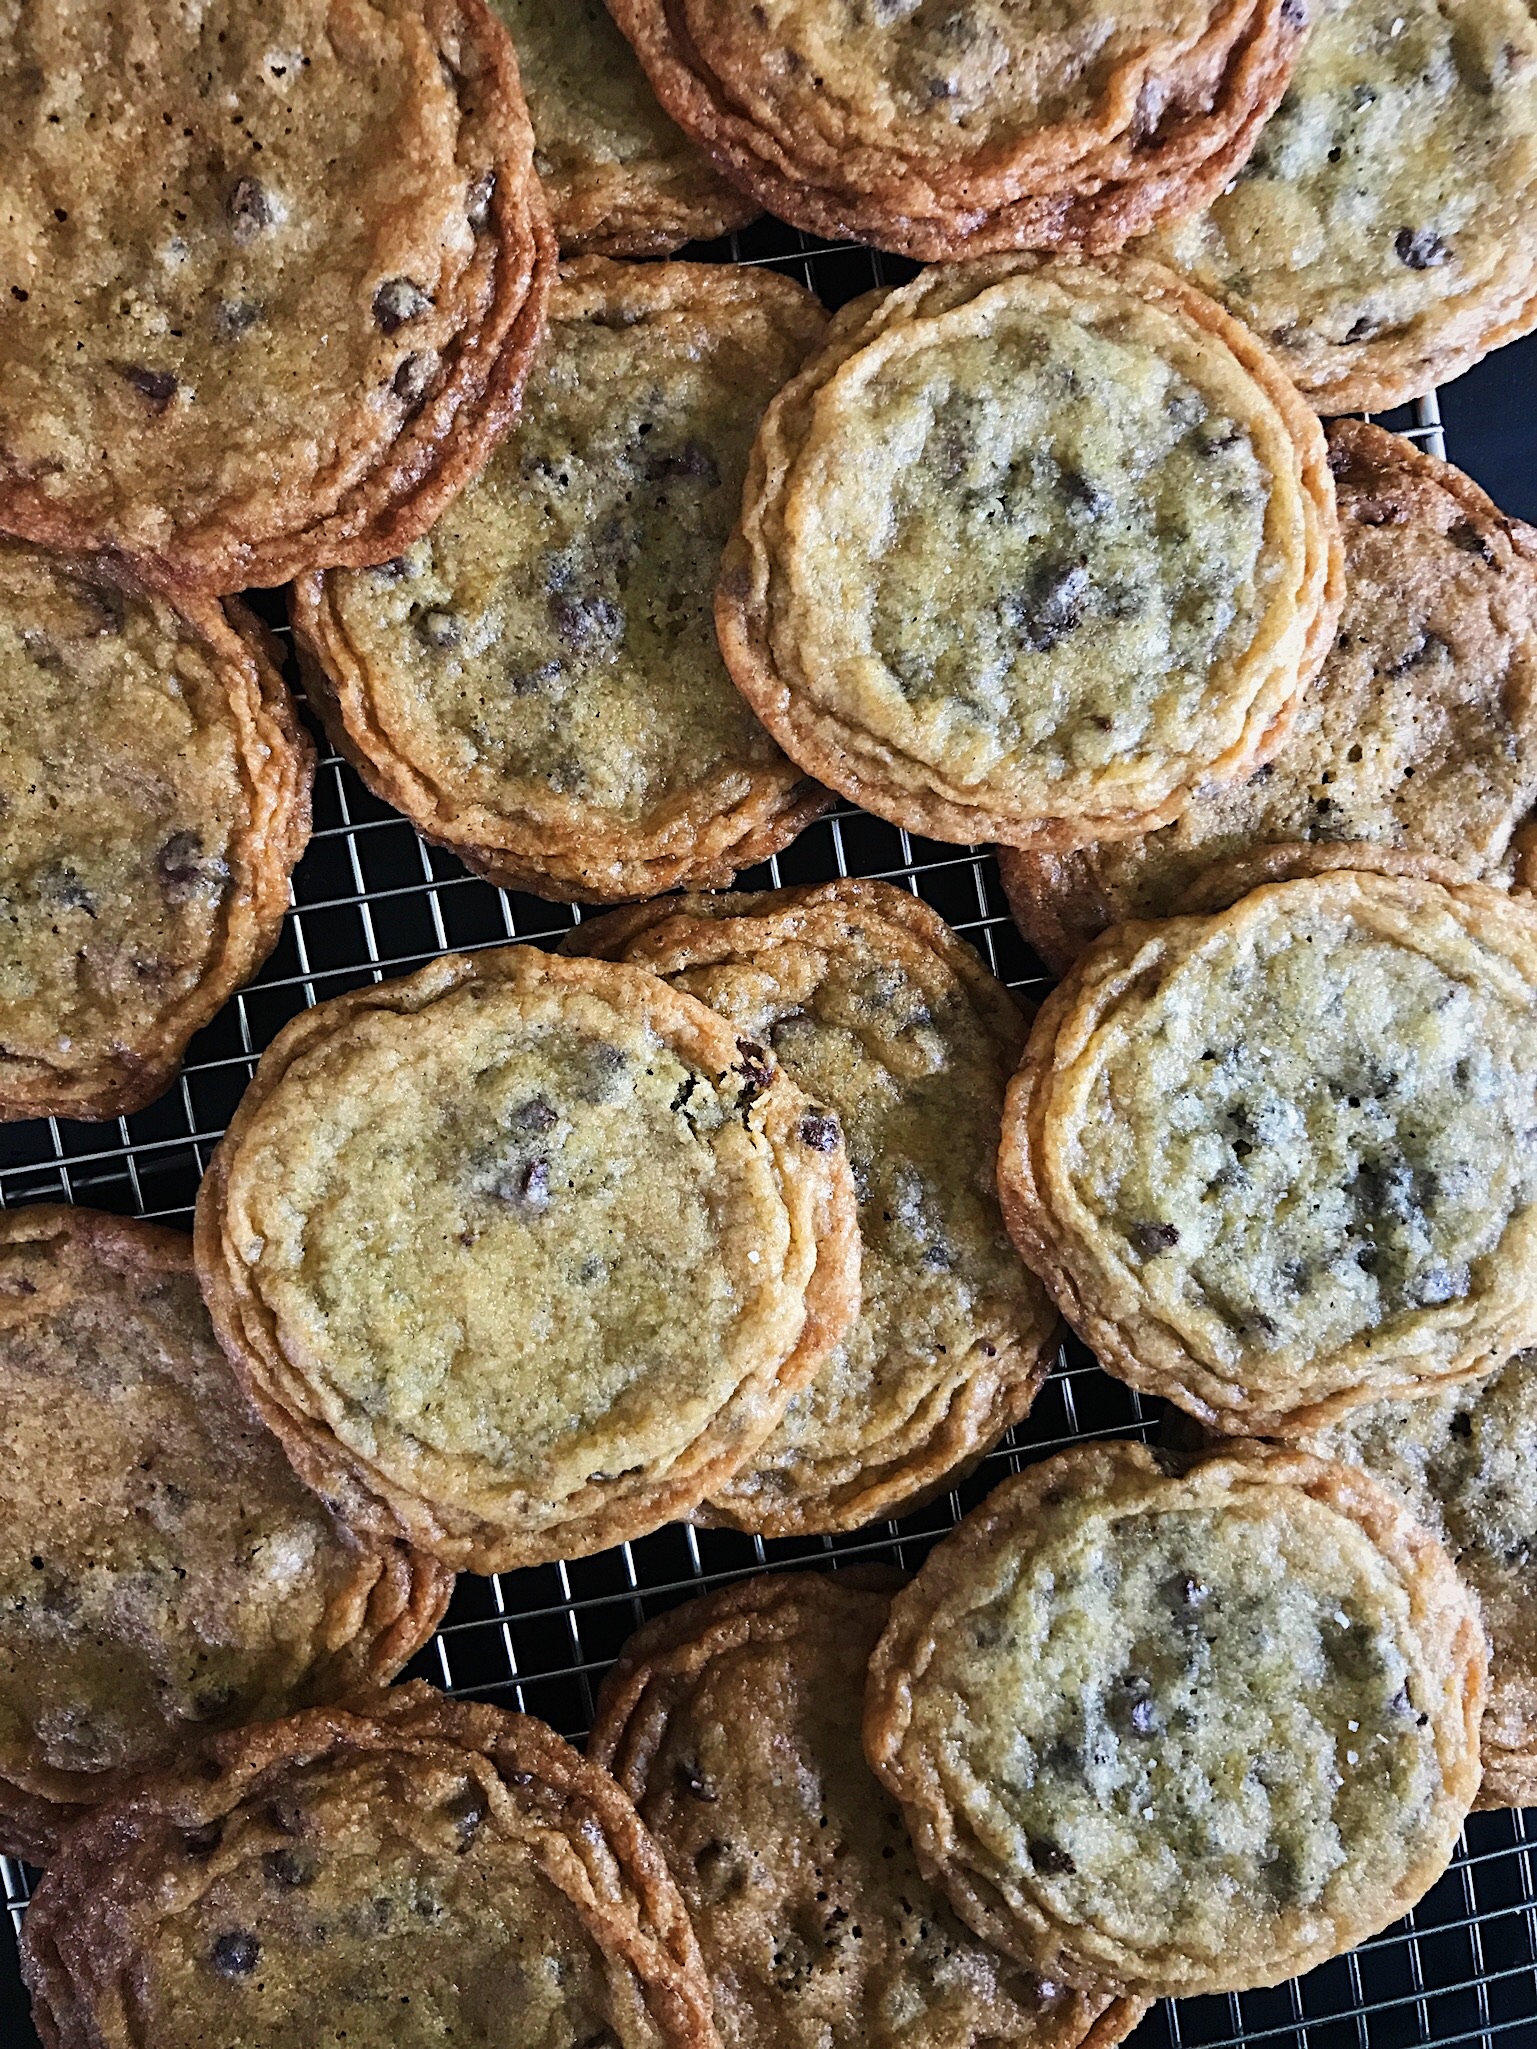
At this point – I had already committed to these cookies – so I figured I needed to give this kind of weird technique a try. Sarah uses this method in order to create little ripples around the edges of her cookies. Not only do they look pretty cool, but it creates a way crispier edge with a soft and chewy center - the best of both worlds.
| Hillary


Chocolate Chip Cookies
Yield, 10-12 large cookies
Ingredients:
2 cups all purpose flour
½ tsp. baking soda
¾ tsp. kosher salt (plus more to sprinkle on top
1 ½ cups sugar
¼ cup packed brown sugar
1/2lb (2 sticks) unsalted butter, room temperature
1 egg
1 ½ tsp. vanilla extract
2 tbsp. water
8 oz. bittersweet chocolate (chopped chocolate bars would work best, but I had mini chocolate chips leftover from the ice cream cake, so I used those)
Adjust an oven rack to the middle position. Preheat the oven to 350°F. Line two baking sheets with parchment or silicone mats.
In a small bowl, combine the flour, baking soda, and salt.
In the bowl of a stand mixer fitted with a beater, beat the butter on medium until creamy. Add the sugar and brown sugar; beat on medium 2-3 minutes, until light and fluffy. Add the egg, vanilla, and water and mix just to combine. Add the flour mixture a few scoops at a time, and mix on low until just combined. Using a spoon, stir the chocolate into the batter.
Using a 1/3 cup measure, scoop a heaping ball of dough onto the prepared cookie sheet (according to the recipe its about 3 ½ oz each). These are big cookies – but they need to be this big in order to get the crunchy ripples and soft center. Place four balls of dough an equal distance apart on prepared pan and transfer to the freezer for 15 minutes before baking. Do not skip freezing the dough; it prevents the dough from spreading too much, and helps create aids in the crinkly outer layer. When the first baking pan goes into the oven, put the second one in the freezer.
Place the chilled baking sheet in the oven. Bake for 10 minutes – the cookies will be puffed slightly in the center. Now here it comes -- lift the side of the baking sheet up about 4″ from the oven rack and let it drop down against the rack, so the edges of the cookies set and the inside falls back down. Do this 2-3 times. Remember, “this will feel wrong, but trust me”. After the cookies puff up again in 2 minutes, repeat lifting and dropping the pan; repeat this step a few more times to create ridges around the edge of the cookie. Bake 16 to 18 minutes total, until the cookies have spread out and the edges are golden brown but the centers are lighter in color and not fully cooked.
After removing them from the oven, transfer the baking sheets to a wire rack; let the cookies cool completely before removing them from the pan.